
我平时工作因为有多台 Windows 设备,或者之后需要装新的 Windows 设备,常常需要同步多个设备之间的操作习惯(再加上我有一台 mac),故而写一个文档,方便装机同步。
当然大家也可以看一下我的软件列表,有些软件还是可以大大提高效率的。
软件
基础软件
- Google Chrome :浏览器,上网冲浪必不可少,推荐安装插件详见:Chrome 配置方案
- 7-Zip: 压缩解压缩
- 微信:聊天、沟通、摸鱼
- Snipaste: 截图
- 坚果云: 文件夹云同步,199 一年
- AutoHotKey: 热键,其配置详见:AutoHotKey 配置方案
工作相关
- Microsoft Office:浙大购买了相关的软件许可,具体访问浙江大学科研软件平台
- Adobe:浙大购买了相关的软件许可,具体访问浙江大学科研软件平台
- TeamViewer : 远程连接
- Rere : 休息提醒
- WPS
- Zotero: 文献(pdf 电子书)管理器
- 为了能够使用坚果云同步,需要配置如下:
texlive: Latex 的编译器,想要在 VSCode 上写论文必备
DingTalk: 工作交流、合作工具
开发相关
- Typora : markdown 编辑器
- Visual Studio Code: 代码编辑器,详细配置请见下方VSCode 配置方案
- Cmder: Windows 上的终端行命令工具
- Nodejs: 一个建立在 Chrome 的 V8 JavaScript 引擎上的服务器端 JavaScript
- Python
- Jebrain IDEs: 编译器,集成开发环境,学生可以免费申请
- Windows Linux Bash Shell: 方便编译一些 C++库
效率/摸鱼工具
- Ditto: 剪贴板历史
Wox: Windows 的启动器,类似于 Macbook 的搜索(推荐快捷键:
ctrl+space)- 配合Everything (用于搜索文件) 使用更加
Listary: 类似 Wox,曾经以 Listary 为主力,目前已经转向 Wox
- QuickLook: 快速预览
- ScreenToGif: 录屏转换为 gif,表情包制作大师
- Dism++: Windows 性能优化(清垃圾专用)
- PicGo: 图床,配合阿里云 oss 使用
优效日历: 增强 Windows 任务栏的日历
Clash: V2Ray 客户端
- oss-browser: 阿里云 oss 的客户端
- HotSwap!: 当弹出移动硬盘时显示正在被使用,该软件可以方便 U 盘/移动硬盘的热插拔;首次使用,需要右键 HotSwap! 在系统托盘区域的图标,在设备类型中,勾选可移除磁盘设备与安全移除设备,这样就可以操作 U 盘了。当然用 HotSwap! 操作移动 SATA/eSATA 硬盘也是没问题的
Windows 的一些基础配置
为了能够同步 Windows 和 MacOS 的
ctrl/alt交互,而且我发现ctrl键本身也会比alt常用一些,用小拇指去按会比较累,所以我在 Windows 操作系统上替换了ctrl和alt,方便与 Mac 统一,具体操作方式如下:将下列内容复制粘贴到 txt 中,并重命名为
.reg格式文件,然后双击执行。只需要操作一次就会写入注册表,不需要每次开机都操作。1
2
3
4Windows Registry Editor Version 5.00
[HKEY_LOCAL_MACHINE\SYSTEM\CurrentControlSet\Control\Keyboard Layout]
"Scancode Map"=hex:00,00,00,00,00,00,00,00,05,00,00,00,3a,00,01,00,01,00,3a,00,38,00,1D,00,1D,00,38,00,00,00,00,00具体参考:Windows 中更改 ctrl 与 alt 键互换位置,也可以浏览器搜索博客即可
Chrome 配置方案
推荐安装插件(登录后会自动同步):
- 1Password
- AdBlock
- 购物党
- 广告终结者
- Zotero Connector
- Proxy SwitchyOmega
- 沙拉查词
- 其余一些可装可不装的插件:Earth View from Google Earth, Folx, Free Download Manager, GitHub Isometric Contributions, LaTex2Word-Equation, MathJax Plugin for Github, Octohint, Octotree, Sourcegraph, Stylish, 小丰二维码,简悦
VSCode 配置方案
基础配置
1
2
3
4
5
6
7
8
9
10
11
12
13
14
15
16
17
18
19
20
21
22
23
24
25
26
27
28
29
30
31
32
33
34
35
36
37
38
39
40
41
42
43
44{
"explorer.confirmDelete": false,
"explorer.confirmDragAndDrop": false,
"editor.formatOnSave": true,
"editor.fontFamily": "Consolas, 'Microsoft Yahei', 'Courier New', monospace",
"terminal.integrated.fontSize": 12,
"terminal.integrated.cursorStyle": "underline",
"terminal.integrated.defaultProfile.windows": "cmder",
"terminal.integrated.profiles.windows": {
"cmder": {
"path": "C:\\Windows\\System32\\cmd.exe",
"args": ["/k", "C:\\Program Files\\cmder\\vendor\\init.bat"]
}
},
"files.associations": {
"*.glsl": "hlsl"
},
"editor.wordWrap": "on",
"workbench.editor.enablePreview": false,
"workbench.editorAssociations": {
"*.svg": "default",
"*.ipynb": "jupyter.notebook.ipynb"
},
"workbench.colorCustomizations": {
"terminal.background": "#112233",
"terminal.foreground": "#ffffff",
"terminal.ansiBlack": "#1D2021",
"terminal.ansiBrightBlack": "#665C54",
"terminal.ansiBrightBlue": "#0D6678",
"terminal.ansiBrightCyan": "#8BA59B",
"terminal.ansiBrightGreen": "#237e02",
"terminal.ansiBrightMagenta": "#8F4673",
"terminal.ansiBrightRed": "#FB543F",
"terminal.ansiBrightWhite": "#FDF4C1",
"terminal.ansiBrightYellow": "#FAC03B",
"terminal.ansiCyan": "#8BA59B",
"terminal.ansiGreen": "#95C085",
"terminal.ansiMagenta": "#8F4673",
"terminal.ansiRed": "#FB543F",
"terminal.ansiWhite": "#A89984",
"terminal.ansiYellow": "#FAC03B"
},
"javascript.updateImportsOnFileMove.enabled": "always"
}VSCode 插件
Prettier: 根据配置自动美化代码
1
2
3
4
5{
"editor.defaultFormatter": "esbenp.prettier-vscode",
"prettier.tabWidth": 4,
"prettier.semi": false
}Better Comments: 根据一些规则能够高亮注释
1
2
3
4
5
6
7
8
9
10
11
12
13
14
15
16
17
18
19
20
21
22
23
24
25
26
27
28
29
30
31
32
33
34{
"better-comments.tags": [
{
"tag": "!",
"color": "#FF8C00",
"strikethrough": false,
"backgroundColor": "transparent"
},
{
"tag": "?",
"color": "#FF2D00",
"strikethrough": false,
"backgroundColor": "transparent"
},
{
"tag": "//",
"color": "#474747",
"strikethrough": true,
"backgroundColor": "transparent"
},
{
"tag": "todo",
"color": "#3498DB",
"strikethrough": false,
"backgroundColor": "#fbbc05"
},
{
"tag": "*",
"color": "#98C379",
"strikethrough": false,
"backgroundColor": "transparent"
}
]
}Document This: 自动生成一些注释(对于 JS/TS 的类、函数)
ESLint: 在 VSCode 中集成 ESLint JavaScript
GitLens: 能够去浏览一些代码的修改历史
open in browser: 能够让 html 文件直接右键>在浏览器中打开
LaTex Workshop: VSCode 中写 Latex 必备
1
2
3
4
5
6
7
8
9
10
11
12
13
14
15
16
17
18
19
20
21
22
23
24
25
26
27
28
29
30
31
32
33
34
35
36
37
38
39
40
41
42
43
44
45
46
47
48
49
50
51
52
53
54
55
56{
"latex-workshop.latex.tools": [
{
"name": "xelatex",
"command": "xelatex",
"args": [
"-synctex=1",
"-interaction=nonstopmode",
"-file-line-error",
"%DOC%"
]
},
{
"name": "pdflatex",
"command": "pdflatex",
"args": [
"-synctex=1",
"-interaction=nonstopmode",
"-file-line-error",
"%DOC%"
]
},
{
"name": "bibtex",
"command": "bibtex",
"args": ["%DOCFILE%"]
}
],
"latex-workshop.latex.recipes": [
{
"name": "pdflatex -> bibtex -> pdflatex*2",
"tools": ["pdflatex", "bibtex", "pdflatex", "pdflatex"]
},
{
"name": "PDFLaTeX",
"tools": ["pdflatex"]
},
{
"name": "XeLaTeX",
"tools": ["xelatex"]
},
{
"name": "latexmk",
"tools": ["latexmk"]
},
{
"name": "BibTeX",
"tools": ["bibtex"]
},
{
"name": "xelatex -> bibtex -> xelatex*2",
"tools": ["xelatex", "bibtex", "xelatex", "xelatex"]
}
],
"latex-workshop.view.pdf.viewer": "tab"
}Git History: 查看 git 历史
Auto Close Tag: 自动补充 HTML/XML close tag
HTML Boilerplate: 提供 HTML 模板
npm Intellisense: 自动补全 JS 的 import/require
Path Intellisense: 自动补全文件路径
Rainbow CSV: 让 csv 文件能够以彩虹色显示,比较直观看到每一列
Remove - WSL: 能够让 vscode 直接访问 WSL 的文件
vscode-author-generator: 自动生成关于作者的注释
1
2
3
4{
"author-generator.author": "Jiacheng Pan",
"author-generator.email": "panjiacheng@zju.edu.cn"
}CMake & CMake Tools: 对 cmake 语言进行支持
1
2
3{
"cmake.configureOnOpen": true
}JSON Tools: 帮助美化/最小化 JSON
各种 Snippet 插件:HTML Snippets,JS JSX Snippets,JavaScript (ES6) code snippetsxabikos
Cmder 配置方案
修改默认主题
- 下载或者 clone:AmrEldib/cmder-powerline-prompt
- 下载
powerlinefonts并安装 - 将所有
.lua文件放在${CMDER_HOME}/config中 - 重启 cmder,然后在设置中将字体改成
powerline
对于别名的设置(alias),也就是用一个缩写命令,代替一个长命令,可以将常用的长命令缩写;下面
@REM表示这句缩写;打开${CMDER_HOME}/config/user_aliases.cmd,接下去我都会以${CMDER_HOME}表示 cmder 的安装路径,在我的电脑上,一般是:C:\Program Files\cmder1
2
3
4
5
6
7
8
9
10
11
12
13
14
15
16
17
18;= @echo off
;= rem Call DOSKEY and use this file as the macrofile
;= %SystemRoot%\system32\doskey /listsize=1000 /macrofile=%0%
;= rem In batch mode, jump to the end of the file
;= goto:eof
;= Add aliases below here
gl=git log --oneline --all --graph --decorate $*
history=cat "%CMDER_ROOT%\config\.history"
unalias=alias /d $1
vi=vim $*
cmderr=cd /d "%CMDER_ROOT%"
@REM ls=ndir32 -c -j -2 -p
l=ls --show-control-chars -F --color $*
clear=cls
pwd=cd
open=explorer $*
~=cd C:\Users\Jackie让你的右键菜单栏可以拥有”Open Cmder Here”: https://github.com/cmderdev/cmder/wiki/Context-menu-integration:
将下列内容复制粘贴到 txt 中,并重命名为
.reg格式文件,然后双击执行。只需要操作一次就会写入注册表,不需要每次开机都操作。记得将%CMDER_HOME%替换成你的 cmder 安装路径,或者确保它成为了一个全局变量。1
2
3
4
5
6
7
8Windows Registry Editor Version 5.00
[HKEY_CLASSES_ROOT\Directory\Background\shell\Cmder]
@="Open Cmder Here"
"Icon"="\"%CMDER_HOME%\\icons\\cmder.ico\",0"
[HKEY_CLASSES_ROOT\Directory\Background\shell\Cmder\command]
@="\"%CMDER_HOME%\\Cmder.exe\" /START \"%v\""你可能需要重新启动文件浏览器
防止出现像issues#48988的光标错误:找到
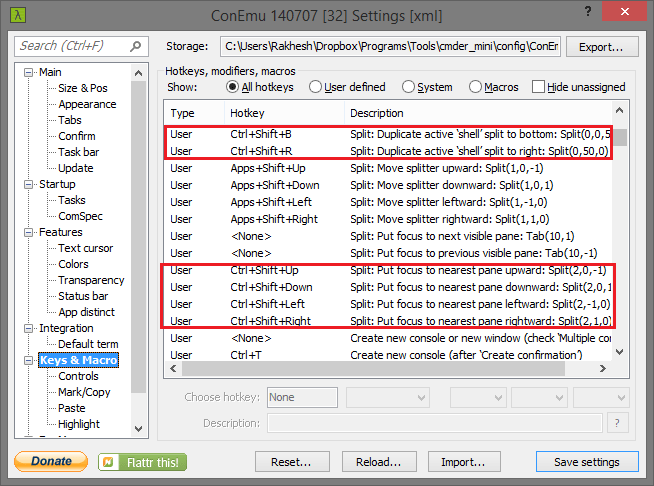
${CMDER_HOME}中所有的λ符号, 主要在${CMDER_HOME}/vendor/clink.lua和${CMDER_HOME}/config/powerline_core.lua中,将 “λ” 替换成 “#” 或者其他的一些符号…新建窗口的快捷键修改:
AutoHotKey 配置方案
为了方便使用,我对一些键用 AutoHotKey 做了自定义的功能,但 AutoHotKey 需要开机运行,所以需要进行配置:
- 首先,AutoHotKey 是每次开机都需要运行一次的,所以不同的设备要能够保持一致,我们需要用坚果云同步
.ahk文件 - 为了开机能够自动运行
.ahk文件,我们需要将该.ahk文件的快捷方式放入一个文件夹,该文件夹中的所有快捷方式都会在开机的时候被执行一次:- Win+R,在打开的运行程序中输入:
shell:startup,回车,会打开一个文件夹 - 将该
.ahk文件放入这个文件夹
- Win+R,在打开的运行程序中输入:
接下去是我的脚本配置:
为了能够用鼠标方便切换不同桌面,我用鼠标的前进后退键,编码成了左右桌面切换,具体脚本如下:
1
2
3
4
5
6
7XButton1::
Send, {Ctrl down}{LWin down}{Right down}{Ctrl up}{LWin up}{Right up}
return
XButton2::
Send, {Ctrl down}{LWin down}{Left down}{Ctrl up}{LWin up}{Left up}
return
Zotero 配置
Zotero 插件
- ZotFile:帮助重命名文件和文件夹,需要对命名规则进行简单的修改:
- 修改重命名规则:”工具>ZotFile Preferences>Renaming Rules”,取消勾选”Renaming Format>Use Zotero to Rename”,将”Format for all Item Type except Patents”按照需要修改,我修改的先后顺序是:title(t),year(y),author(a)
- ZotFile:帮助重命名文件和文件夹,需要对命名规则进行简单的修改:
Zotero 配合坚果云同步
- 在坚果云中新建一个同步文件夹,专门用于同步 pdf:当前我使用
坚果云>应用数据>Zotero>Storage作为同步文件夹
- 在坚果云中新建一个同步文件夹,专门用于同步 pdf:当前我使用
设置 Zotero,让 Zotero 只同步文件结构索引:
- “编辑>首选项>同步>设置”:登录你的账户,勾选”自动同步”和“同步全文内容”,将“同步文献库中的附件”和”使用 Zotero 云存储同步群组文献库中的附件”取消勾选
- “编辑>首选项>高级>文件和文件夹”:将根目录改成步骤 2.1 中设置的坚果云同步文件夹(比如,我使用的
坚果云>应用数据>Zotero>Storage,它的对应绝对路径是D:\应用数据\Zotero\storage);然后将”数据存储位置“修改为当前你的 Zotero 文件夹,比如我用了D:\Zotero - 设置 ZotFile 的”源文件夹”:”工具>ZotFile Preferences”,将”Location of Files”选择为”Custom Location”,将它的值修改为步骤 2.1 中设置的坚果云同步文件夹,设置”Use subfolder defined by”为
/%w/%y
- 对新加入的文件进行重命名(右键>Manage Attachments>Rename Attachments)